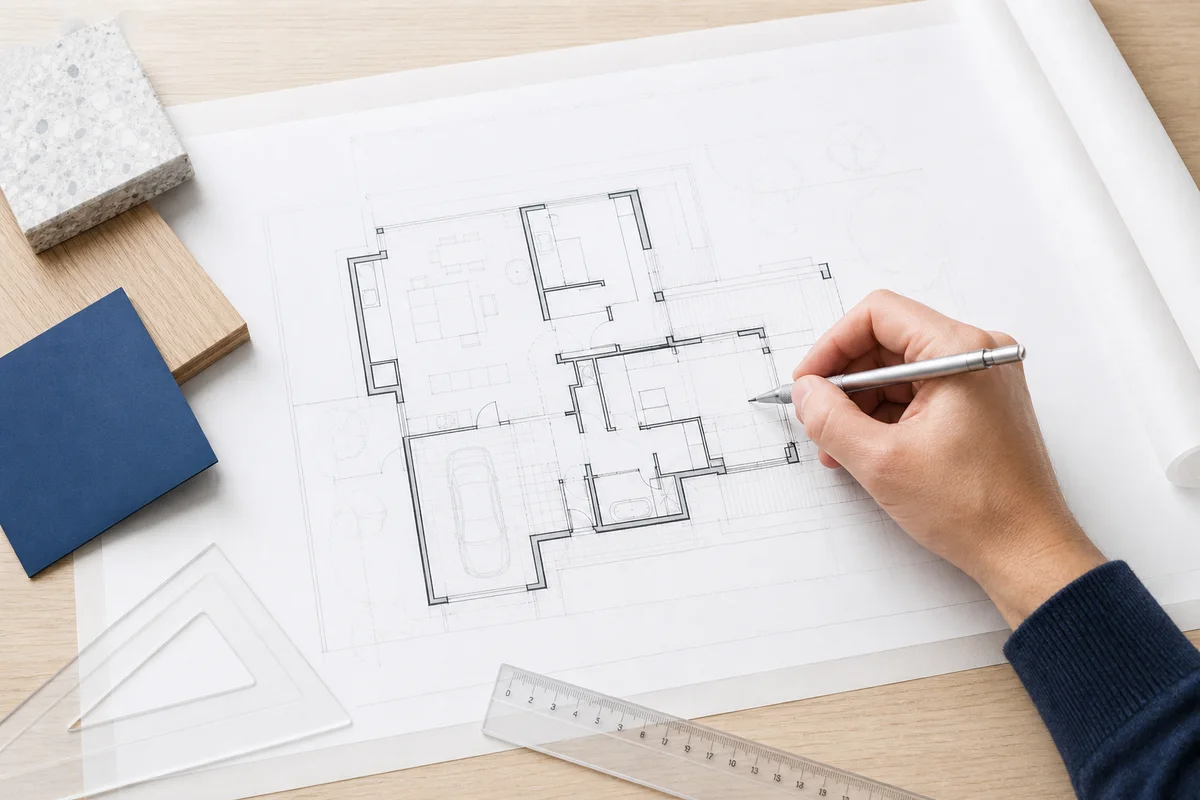
Drawing a floor plan is not mainly about making straight lines. It is about turning a real or imagined space into a reliable map of walls, openings, rooms, and movement. A good plan lets another person understand the layout without standing in the building. It shows what connects, what is separated, and whether furniture and people can fit comfortably.
You can draw a useful first plan with graph paper, a pencil, a tape measure, and a ruler. Digital tools make revisions faster, but the thinking process is the same. Start with accurate information, work from the outside inward, and check every major decision before adding detail. If you want to skip the manual work, try our free AI floor plan generator to create editable floor plan drafts in minutes — no drawing skills needed.
1. Decide What the Plan Is For
The level of detail depends on the job. A homeowner comparing remodel ideas may only need room boundaries, doors, windows, and approximate dimensions. A real estate plan emphasizes clarity and recognizable room names. A construction drawing requires much more: verified dimensions, structural information, code notes, levels, materials, and professional review.
Write down the purpose before drawing. Also note the floor, the units you will use, and whether the plan represents existing conditions or a proposed layout. This prevents an early sketch from being mistaken for a final document.
2. Measure the Outer Boundary
For an existing room or building, begin with the overall footprint. Measure each exterior wall from corner to corner. If the footprint steps inward or outward, record every segment in sequence instead of trying to estimate the total shape from memory.
Choose one unit system and keep it consistent. Record feet and inches carefully, or use meters and millimeters throughout. Take diagonal measurements when a room may not be square. Two walls can have the expected lengths while an angled corner quietly changes the whole geometry.
Photograph each wall and number the photos to match your notes. A simple field sketch with dimension arrows is often more valuable than a neat drawing made from uncertain measurements.
Use a repeatable sequence so missing dimensions are obvious before you leave the site. Measure a room clockwise, record all four wall lengths, and then take at least one diagonal. If a nominal 12-by-14-foot room has diagonals that differ by 4 inches, do not force it into a perfect rectangle on paper. Mark the irregularity and verify the corners. For a larger property, take one or two overall dimensions across several rooms as a check against the smaller measurements.
3. Choose a Scale
A scale converts real dimensions to a manageable drawing. On graph paper, one square might represent 6 inches, 1 foot, or 0.25 meters. Common professional scales include 1:50 and 1:100 in metric work, or 1/4 inch equals 1 foot in imperial work.
Pick a scale that fits the complete footprint on the page while leaving room for dimensions and notes. Do not change scale halfway through. If the plan is digital, the software usually stores real dimensions and handles zooming for you, but you should still understand the intended print scale.
Before drawing every room, test the longest wall at the chosen scale. A 48-foot building drawn at 1/4 inch per foot needs 12 inches of paper before margins or dimension strings. Discovering that conflict early is much easier than redrawing a nearly finished plan.
4. Draw Exterior and Interior Walls
Draw the outside walls first. Confirm that the total width and depth agree with your field notes. Then locate interior partitions by measuring from known exterior corners or other fixed references. Avoid building a chain of small measurements across many rooms because small errors accumulate.
Represent walls with two lines or a clear filled thickness rather than a single centerline. Exterior walls are often thicker than interior partitions. At concept stage, the exact construction may be unknown, but consistent wall thickness makes the plan easier to read and prevents rooms from appearing slightly larger than they are.
5. Add Doors, Windows, and Fixed Elements
Mark each door opening and show its swing with an arc. The arc immediately reveals conflicts with cabinets, toilets, other doors, or circulation. Sliding and pocket doors use different symbols, so identify them accurately.
Place windows by measuring from a nearby corner to the opening, then record the opening width. For remodel planning, note sill height when it affects counters, furniture, or privacy. Add stairs, columns, fireplaces, plumbing fixtures, built-in cabinets, kitchen counters, and other fixed elements before loose furniture.
If symbols are unfamiliar, review our floor plan symbols guide before finalizing the drawing.
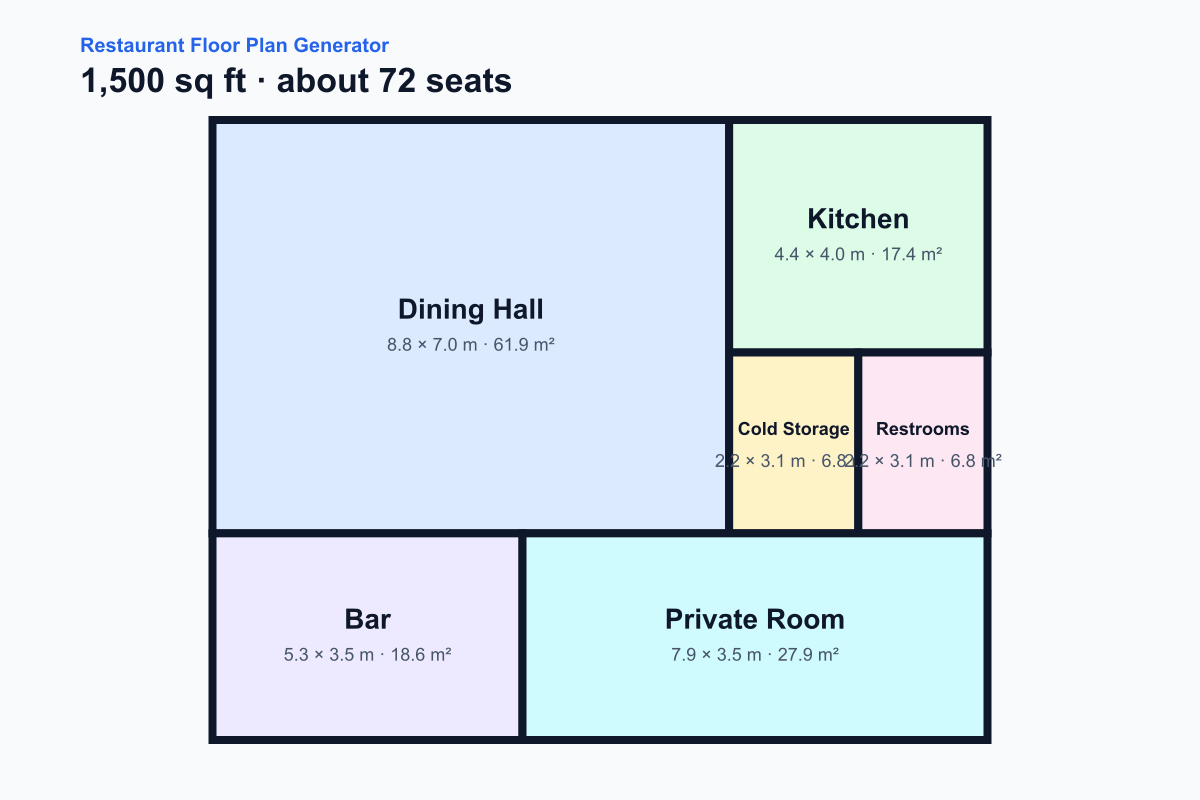
This example shows the drawing order clearly: exterior footprint first, then walls and openings, followed by room labels. Commercial plans add another test because staff and guest routes must work at the same time. For that use case, the restaurant floor plan generator provides a dimensioned, editable draft you can inspect and refine.
6. Label Rooms and Add Dimensions
Use familiar room names and keep labels centered where possible. Dimensions should answer practical questions without covering the drawing. Start with overall building dimensions, then add major room sizes and critical openings.
Do not duplicate every measurement. Too many dimension strings create noise and make contradictions more likely. A reader should be able to understand the overall footprint, locate partitions, and verify important clearances.
For an early layout, room width and depth may be enough. For measured existing conditions, include the dimensions needed to reconstruct the plan. Always state whether dimensions are approximate.
Check the written format as carefully as the geometry. In imperial units, 9 feet 12 inches must roll over to 10 feet 0 inches; leaving it as 9'12" makes a correct line look unreliable. In metric work, decide whether the project uses meters to two decimal places or millimeters as whole numbers. Mixing 3.60 m, 360 cm, and 3,600 mm on one small plan invites transcription mistakes.
7. Test Circulation and Furniture
A technically accurate outline can still describe a poor layout. Imagine entering through the main door and walking to every major destination. Look for routes that cut through seating, cross the kitchen work area, expose private rooms, or force people through narrow gaps.
Add simple furniture blocks at realistic sizes. A bedroom needs more than space for a mattress; it needs approach space, door clearance, and storage access. A dining table needs room for chairs to pull out. In an office or shop, accessible routes and turning areas may control the arrangement.
Read the plan as a sequence of daily actions. Our beginner's guide to reading floor plans provides a useful checklist for this review.
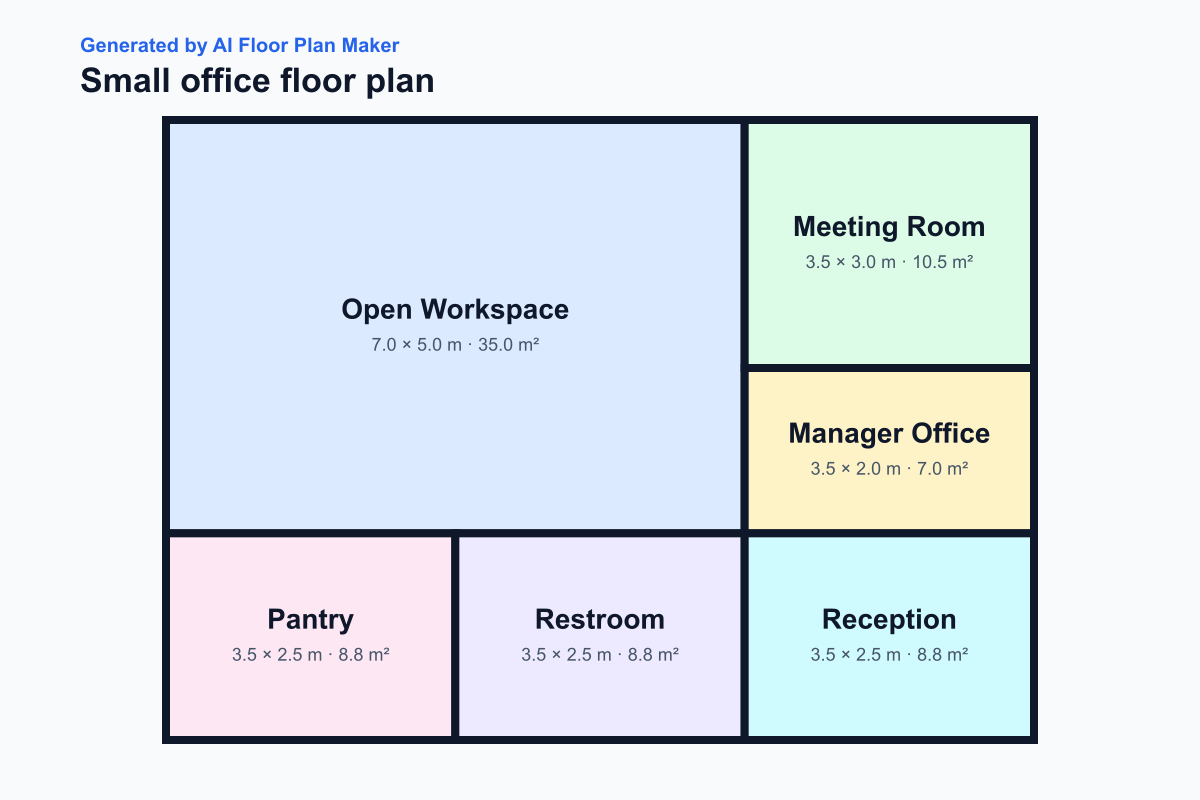
An office makes circulation problems easy to see. Desks may fit mathematically while chair movement blocks the route to a meeting room or restroom. Use the office floor plan generator to compare workspace, meeting, reception, and support zones before committing to furniture purchases.
8. Redraw Cleanly and Verify
Once the layout works, produce a clean version. Align walls, close accidental gaps, use consistent line weights, and remove construction marks. Add a title, scale, date, and revision note. Then compare the finished plan against the original measurements one more time.
Check that room dimensions add up to the overall footprint after wall thickness is considered. Confirm every door and window. If you edited a proposed layout, compare the revision with the original so you understand which walls moved and what those changes affect.
Common Mistakes When Drawing Floor Plans
Most weak floor plans fail because several small assumptions compound, not because someone cannot draw a line. These five checks catch the errors that most often make a plan difficult to trust or use.
Treating every corner as square
A room can measure 10 by 12 feet and still be out of square. If one diagonal is 15 feet 7 inches and the other is 15 feet 10 inches, drawing a perfect rectangle hides a 3-inch discrepancy. Take diagonals in irregular rooms and flag uncertain corners instead of silently correcting them.
Ignoring wall thickness
Drawing partitions as zero-width lines inflates usable space. A typical wood-framed interior partition may occupy roughly 4 1/2 to 5 inches, while exterior assemblies can be thicker. Across several rooms, those inches add up. Show a consistent thickness and distinguish clear room dimensions from dimensions measured to wall centerlines.
Forgetting door and furniture clearance
A door symbol is not complete without its swing. A 30-inch door can collide with a vanity even when both fit separately. A standard U.S. queen mattress is about 60 by 80 inches, but a usable bedroom also needs walking space and access to storage. Behind a dining chair, roughly 36 inches is a useful starting check for pulling out the chair; allow more where people need to pass behind it.
Mixing units or rounding too early
Converting each segment separately can create a footprint that no longer closes. Keep the original measurements, calculate at full precision, and round only the displayed value. A string of six walls rounded by half an inch each can introduce a 3-inch mismatch at the final corner.
Adding detail before the circulation works
Furniture, textures, and symbols can make a bad layout look finished. First verify entrances, primary routes, room connections, and door conflicts. A residential hallway may be sketched at 36 inches as an early planning check, but accessibility and local building rules can require different clearances. Treat the number as a prompt to verify, not a universal code guarantee.
Hand-Drawing vs AI Generation: When to Use Which
Hand-drawing is best when you are standing inside an existing space. A pencil sketch accepts quick corrections, odd corners, field notes, ceiling changes, and reminders such as “verify column” without interrupting the measuring process. It is also the fastest way to test one rough idea in a conversation. The weakness is revision: moving a wall can force you to redraw labels, furniture, and dimensions around it.
AI generation is most useful before exact drafting, when you want several plausible arrangements from one room program. Give it the total area, required rooms, adjacencies, and special constraints; then compare the alternatives. It can save time on early zoning and produce a clean visual for discussion, but it cannot inspect hidden structure, confirm field measurements, or interpret local requirements without verified inputs.
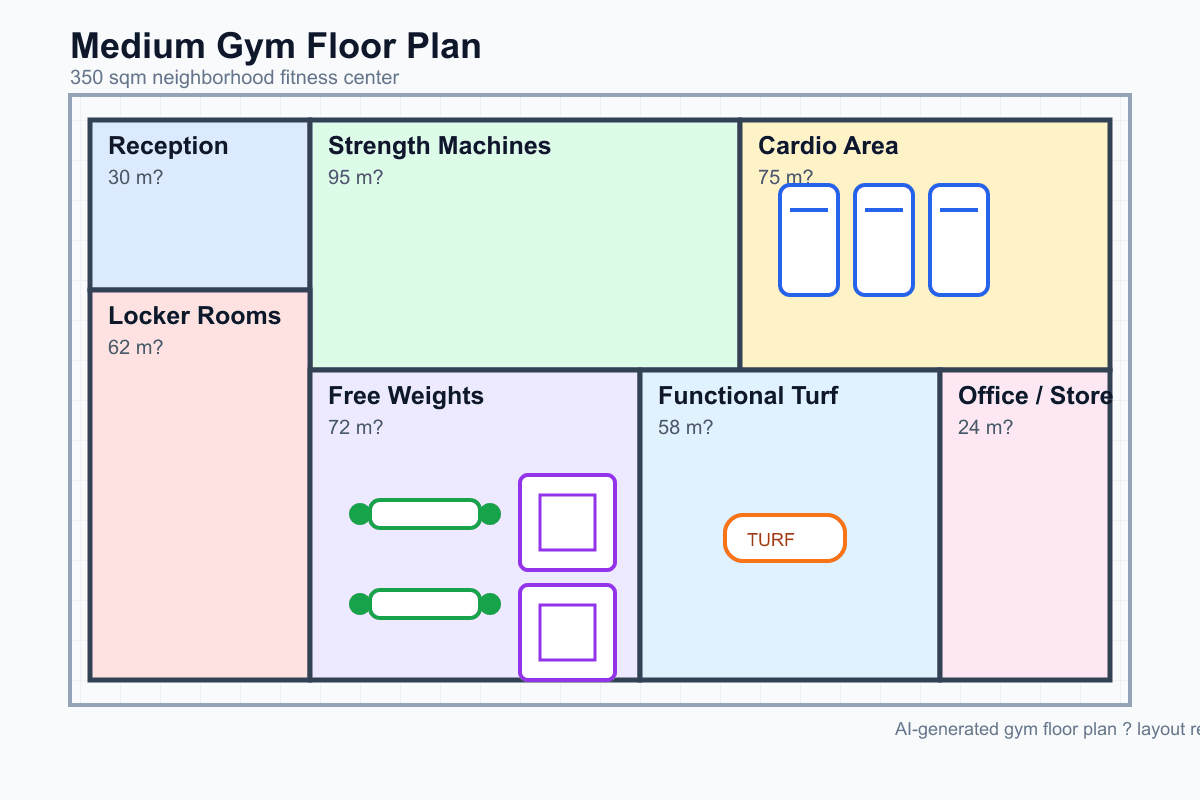
A plan with several activity zones, such as this gym, is a good AI use case because the first question is how much area each function receives. The gym floor plan generator can create a starting arrangement for cardio, strength, lockers, reception, and support space. You still need to confirm equipment clearances, structure, egress, accessibility, and applicable codes.
The strongest workflow combines both methods. Measure existing conditions by hand, turn the verified room program into one or more digital concepts, and then compare the generated geometry with your notes. Refine the chosen option in an editor or CAD tool. Use AI to explore alternatives and communicate ideas; use verified measurements as the basis for the next drafting stage.
Final Checklist
Before sharing the plan, confirm the footprint, wall locations, openings, scale, room names, and major clearances. Make sure the file is labeled as a concept, measured plan, or construction document. A clear floor plan does not need to be decorative. It needs to be consistent, legible, and honest about what has been verified.
For layout reference only. AI-generated concepts and early drawings are not construction documents; have dimensions, structure, accessibility, fire safety, and local code requirements reviewed by qualified professionals before building.